Painting Bathroom Countertops Instead of Replacing
When it comes time to give your bathroom a complete overhall you can undergo a remodel, or, if your looking to save a few bucks, you can purchase a few cans of paint – stick with me here. This article is dedicated to painting your bathroom countertops as part of our article series on giving your bathroom a complete renovation without remodeling.
Painting over your existing countertops is a great way to revitalize the space while adding a personal touch of vibrant flare with minimal cost. With just the right preparation and patience, you can get stunning results that look as if they were replaced by professionals. Here’s the DIY step-by-step guide to paint your bathroom countertops without the need for extensive painting experience.
Prep
The preparation – when it comes to painting, will be an important process as this is the key step to ensuring a successful DIY project.
- To start, the counters need to be thoroughly cleaned and dried.
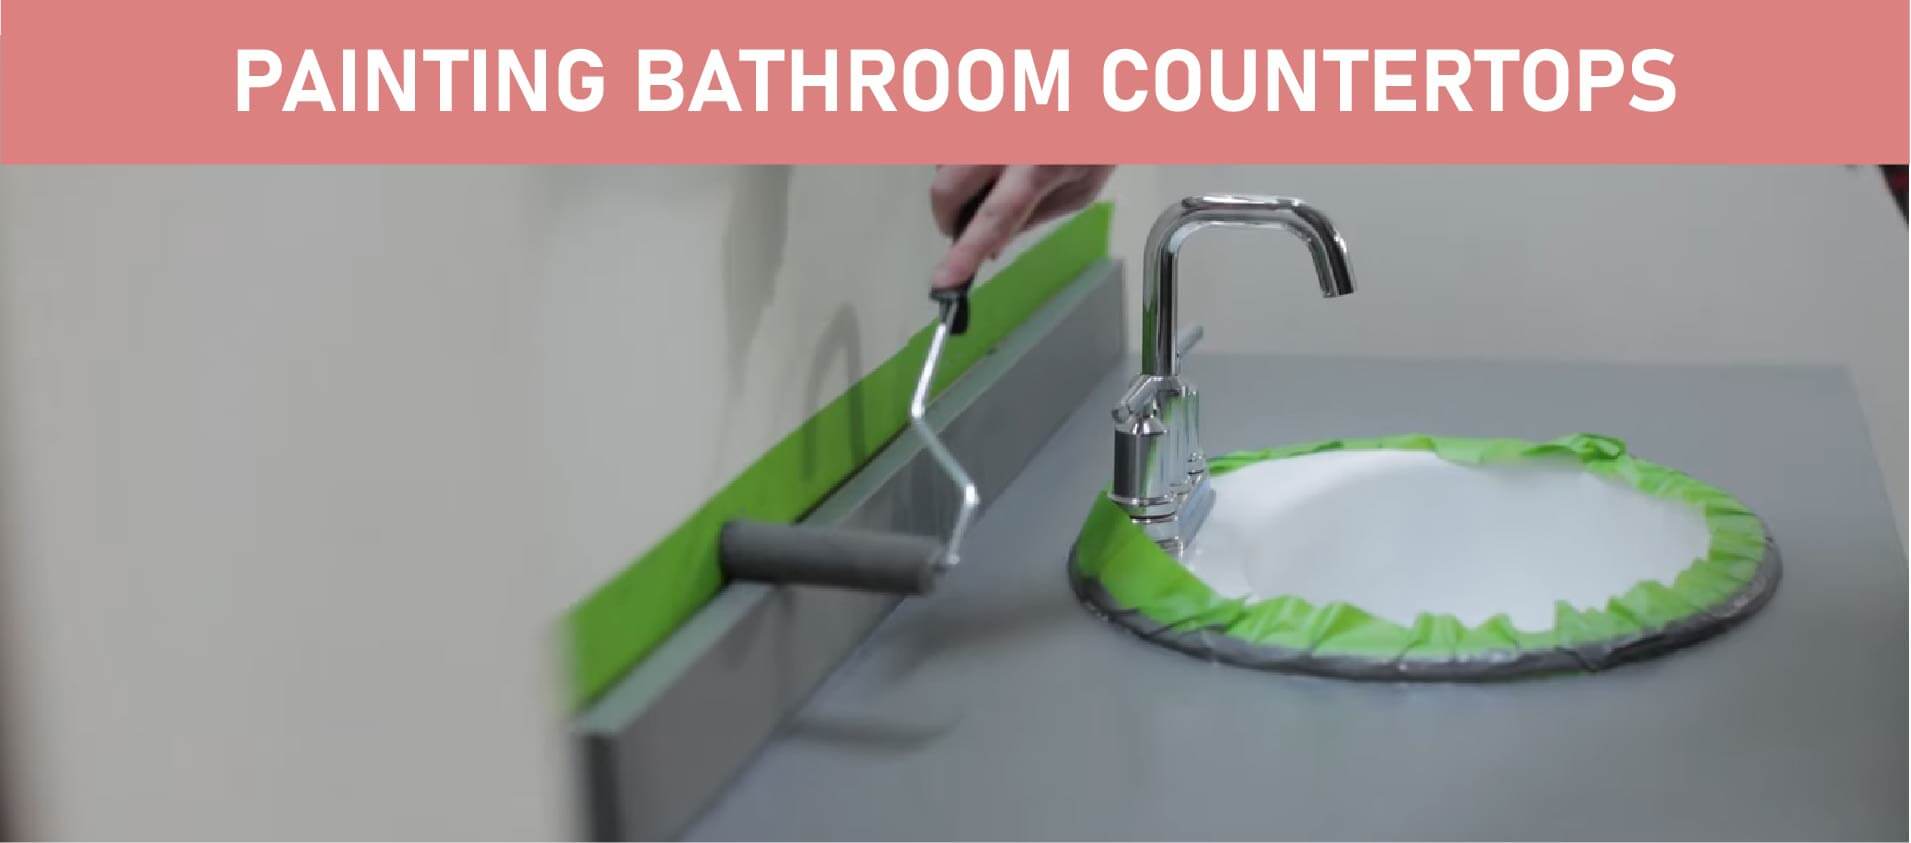
- Mask off any areas where you don’t want paint ending up- using painter’s tape.
- Carefully sand any glossy surfaces until they become dull.
- You can also use a chemical de-glosser if needed, however, sanding will give paint a better tooth for sticking.
- Before beginning the painting process, you’ll want to cover the walls and floor with plastic drop cloth or newspaper to protect your bathroom from accidental drips of paint. Use more painter’s tape to secure your drop cloth so they’re secure.
Below is more detail on preparing the surface. Once the surface is prepped and drop cloths are in place you can jump into painting the bathroom countertops.


Cleaning and sanding
To achieve a truly beautiful paint job on top of any bathroom countertop, it all starts with giving these surfaces the proper preparation for painting. Cleaning and sanding are vital in providing a smooth and matted surface for a new coat of paint. This step is very important as you’ll be taking the time to properly clean and sand the countertop so that no bumps or shiny surfaces are showing on the surface.
This ensures that when you apply the first layer of paint, you’ll get a professional-looking finish with no visible signs of being painted. And with plenty of patience and attention to detail, you can transform your countertop surface and make it look like it’s brand new.
Applying painter’s tape
Now there is a trick to applying Painter’s tape when you are masking-off areas where you don’t want excess paint to appear. It’s an important step when painting bathroom countertops since this type of tape is used for protecting surfaces that aren’t supposed to be painted. Painter’s tape can be used anywhere you want to help protect surfaces and edges that eventually become masked off.
This includes wallpaper, wooden surfaces, tile, and any other surfaces that paint may splatter or drip while you’re applying the first coats. You can add newspaper or plastic drop cloth with additional painter’s tape to cover entire sections of your work area as needed. It might be time-consuming however, preparation like this gives your finished surfaces and surrounding more of a professional look and cleaner finish.
As usual, you’ll want to carefully tape off these areas that are being protected with single strips of painter’s tape, then, lightly press down the tape along select edges before swiping your fingers along the strip to get better adhesion. By taking your time when applying the painter’s tape always use both hands to pinch the tape to get straighter masking lines. This step makes all the difference when painting bathroom countertops so you have cleaner painted edges.
Choosing the Right Paint for Countertops
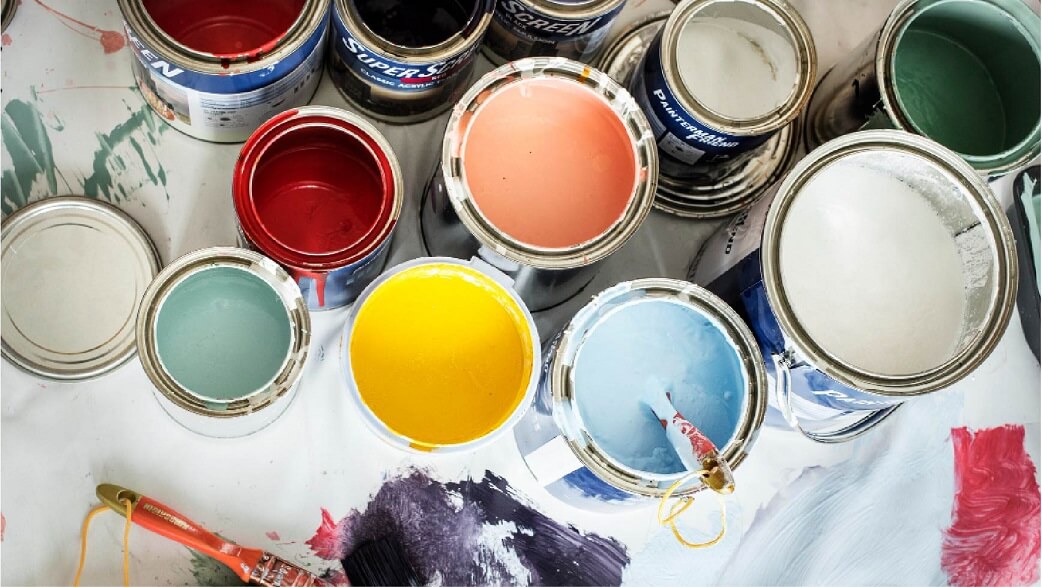
Specifically- when it comes to painting countertops, it’s essential to choose the right kind of paint. Thankfully, there are durable options, especially if you consider using a two-part epoxy paint that’s specially formulated for bathroom surfaces. This unique 2-part paint system features waterproof properties, making it difficult for water to penetrate and cause damage like chipping or peeling.
This is the main reason why it’s used for things that float in water like boats, jet skis, and surfboards. Additionally, epoxy-based paints are particularly tenacious on surfaces that are prepped with a sanded surface beforehand. However, if you prefer to use traditional paint products, be sure to opt for good-quality acrylic or oil-based enamels that are also durable up to a point.
While these choices are resistant to moisture when they are dry, it will be an absolute must to apply a durable sealant to keep out excessive moisture. You’ll also need to choose, ensure that the right brand has the exact color you’re looking for, and read over the application instructions in drying times. This is just one more step closer to getting beautifully painted bathroom countertops that will last and look great for years to come.
Selecting an interior paint that will adhere well to the countertops
Let’s talk about paint for a second, since updating the color of countertops within your bathroom can be an intimidating task. Don’t let the DIY boogieman fool you, it’s actually one of the easiest changes that can be made.
Choosing the right interior paint is not like buying the stuff you paint your walls with. You want to achieve a lasting finish that will be easy to refresh (every so often) and easy to clean.
By selecting an oil-based paint you stand a good chance of having an easier time taking care of it than acrylic. Oil-based paints typically provide a strong layer of protection against moisture and cleaning over the long run. But using oil paint right onto a sanded countertop is simply not enough, as you’ll need to add a primer first before painting any oil paint over that. Primer is used on many surfaces to ensure adhesive strength when applying the first coat of paint.
This is why you see cars being primed before they are painted. And luckily when choosing colors, oil paint is outstanding to achieve the exact color you want with the help of a paint store expert who can mix it, especially for you. Just so you know- light colors are best as they deflect sunlight and make the space appear larger than it otherwise would. Oil paint is slightly more expensive than acrylic, but for how long it lasts, it’s worth the extra amount you’ll pay.
Acrylic paint is water-based and also comes in an amazing array of colors. It’s cheaper than oil paint but is more prone to scratching. It also does not stick well to countertops without the help of primer that’s painted beforehand. Any specialty paint store will recommend a primer and acrylic paint that works excellently on countertops. They can also advise and recommend the best solution for sealing these painted surfaces afterward for the longest-lasting results.
Selecting paint colors
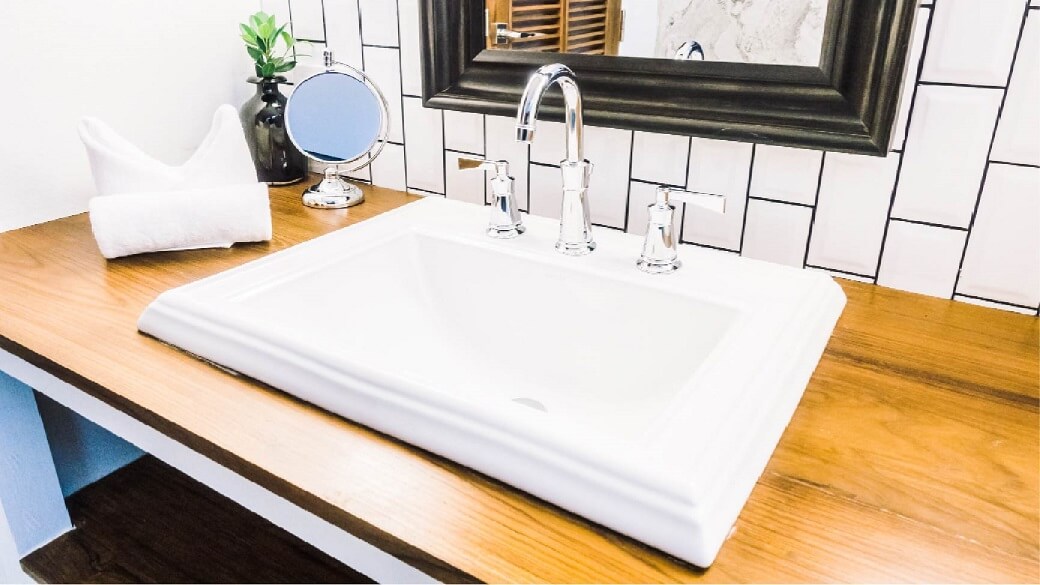
When painting bathroom countertops, a lot of people choose light colors. These are popular because they help make the room look bigger and deflect sunlight.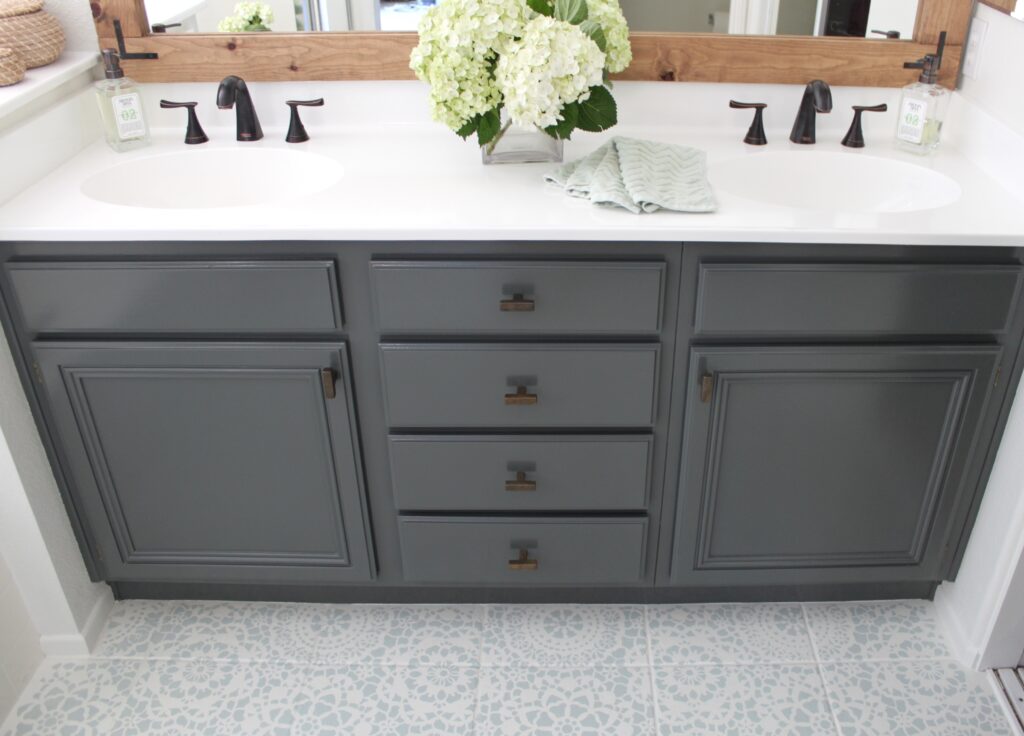
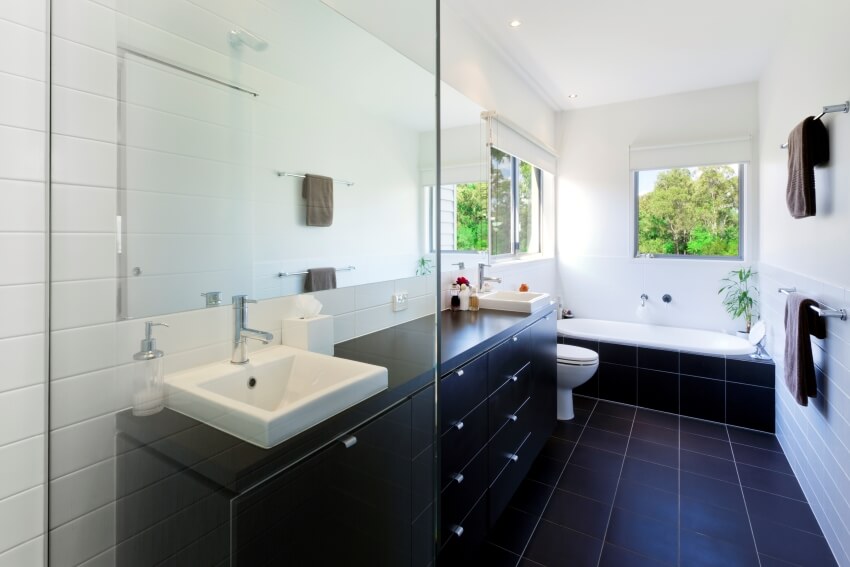
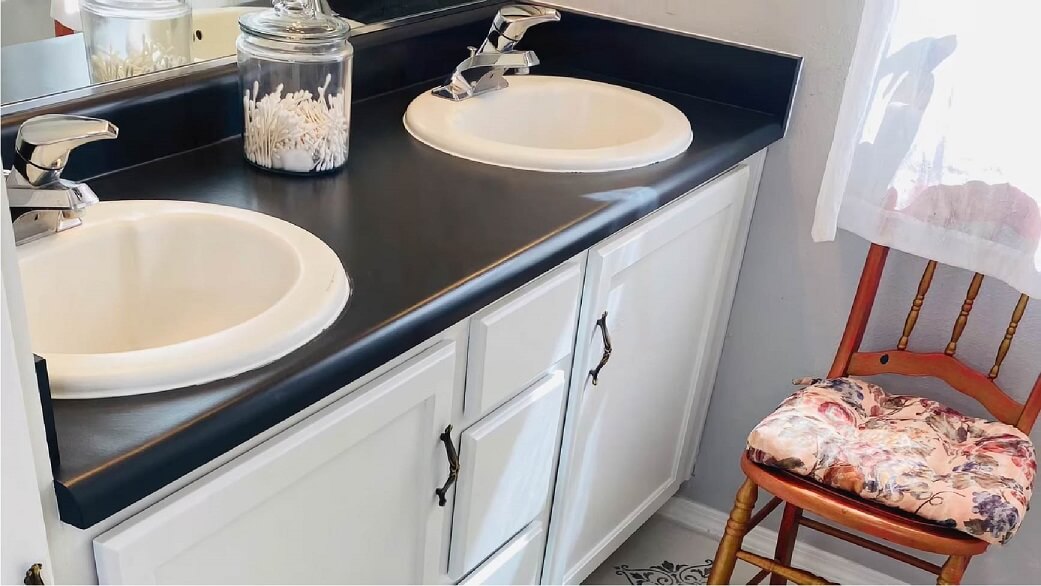
While light colors are the go-to choice for bathroom countertop painting, considering a darker shade like black can add a touch of elegance and sophistication to the space. Black countertops are trending in modern bathroom designs because of their sleek and versatile appearance. They work well with various themes or color schemes, from traditional to contemporary. Black is a practical color choice because it hides stains and dirt better than lighter colors, making maintenance easy. Black is highly reflective, which means that it can reflect more light instead of absorbing it, providing an illusion of more space in smaller bathrooms.
Keep in mind, you’re not stuck with having to go with a non-textured single color surface either. With the popularity of refinishing countertops instead of replacement, there are endless DIY kits that require little skill and offer endless texture design options.
Selecting Paint For Laminate Countertops
If you don’t know, laminate countertops are made with a layer of material that’s bonded onto the MDF board. It’s important to select paint that will stick to laminate if you want a long-lasting finish. You also want to apply a primer onto the laminate to get your paint to stick better. For the best results when painting laminate countertops, you should use oil or alkyd-based paints. This is because laminate is plastic-based and many cause acrylic paints to chip easier.
And while oil-based paints have superior adhesion and are highly resistant to moisture, they are more forgiving to surfaces that may flex more often. This means they’re less likely to peel, chip, or wear away over time. They also offer greater resistance to scratching than other types of paints and can withstand it. Additionally, oil-based paints come in a variety of finishes including gloss and semi-gloss which will help protect the countertops for years to come.
Alkyd-based paints are also oil-based so they will do nicely for laminate countertops as long as you use the proper primer to get the best adhesion. Before painting your laminate countertop, make sure you properly clean and sand these surfaces with fine-grit sandpaper so that there are no bumps or areas that are left un-sanded. This helps either of these oil-based paints have the best chances of adhering to laminate tops for many years.
Selecting Paint For Marble Countertops
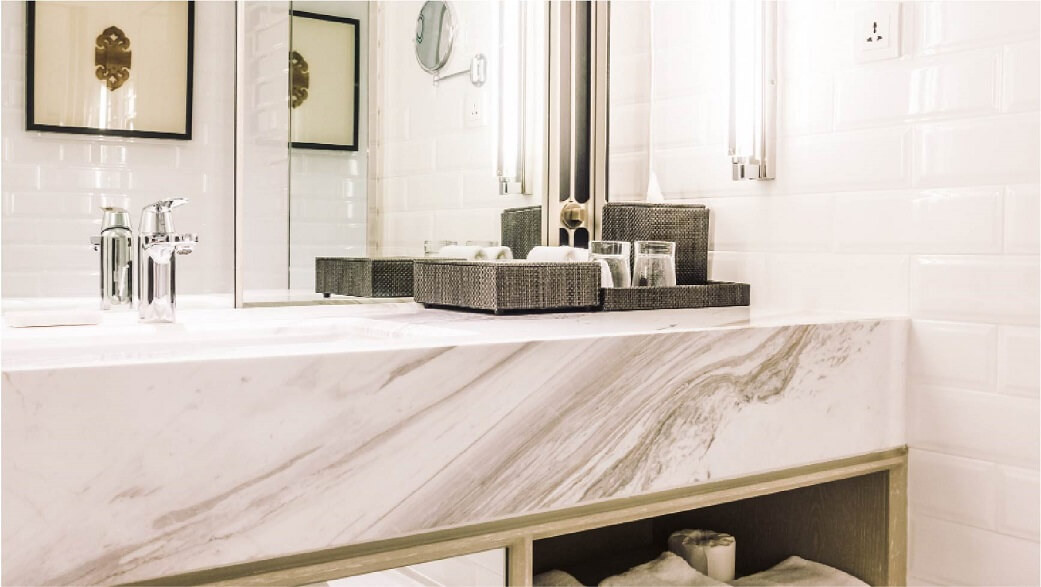
It might sound like a costly mistake to paint over marble countertops, but many people prefer changing the color of the marble to something more attractive. Your best bet is to use oil or alkyd-based paints if you use a superior primer beforehand. The best advice is to use chalk paint or epoxy-based paints when painting marble countertops. Chalk paint is typically a matt finish which can have added colors and marble-like effects painted on top before it’s sealed.
Oil-based paints are very nice for painting since they take longer to dry and can allow various textures and paint effects to be added. You can simulate a marble surface easier with oil paints using a turkey feather to create the lines and veins you usually see in marble. Oil paints offer better resistance when it comes to scratches and can withstand most cleaning chemicals found in household cleaners.
Additionally, oil-based paints come in a variety of finishes including matt, semi-gloss, or gloss depending on your preference. When prepping marble countertops, be sure you properly clean and sand the surface. Use fine-grit sandpaper that’s 300-450 grit to give the primer adequate bite and ensure a bond that will stick over the years to come. Afterward, you’ll apply your paints and let them dry, adding a sealer to protect the entire finish.
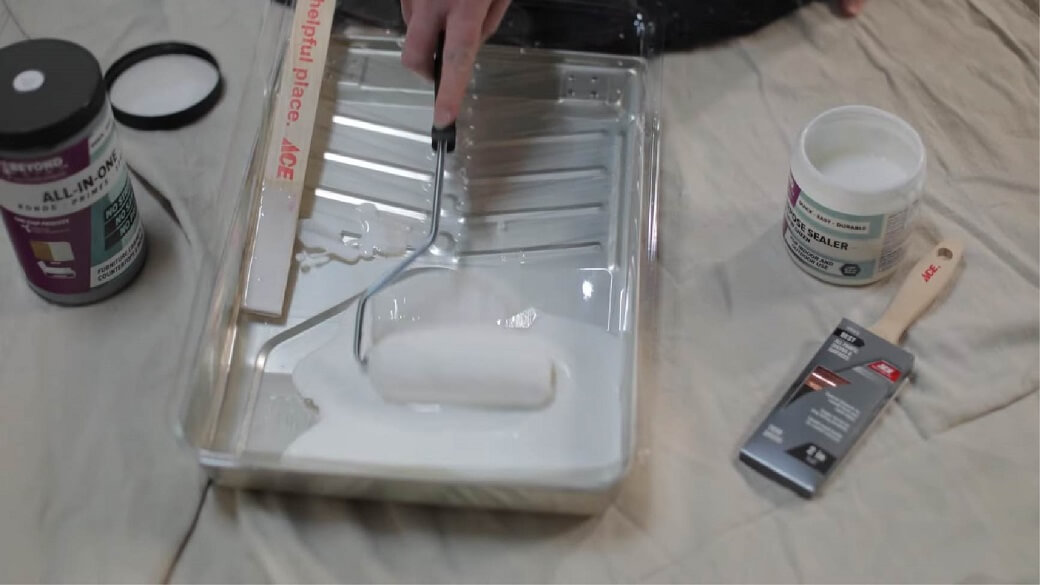
Applying Primer And Paint
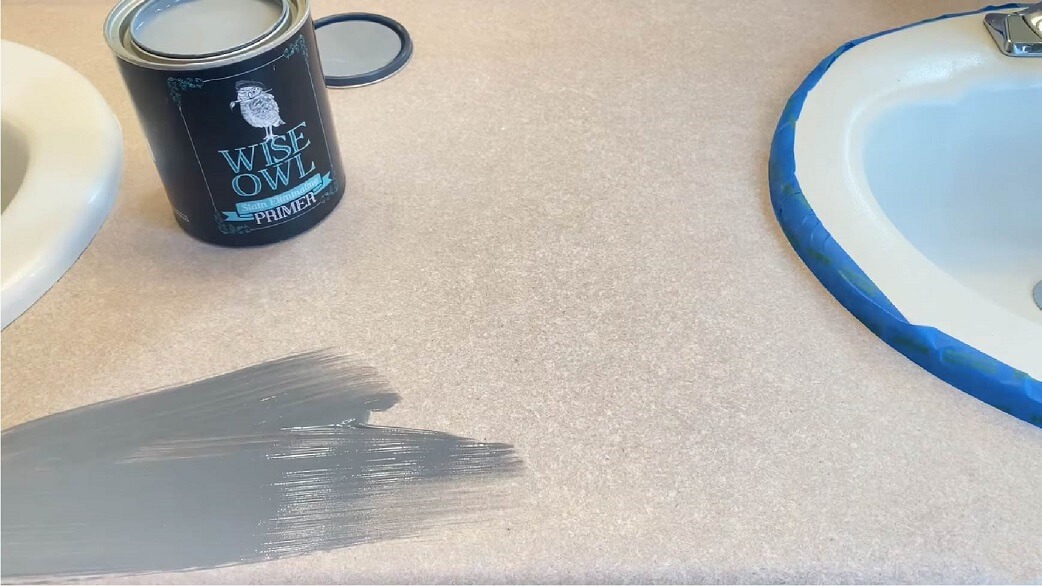
One of the most common tricks of painting any countertop is using a primer to act as a bonding layer for the paint you’re using. Since you might not want to replace an existing countertop entirely, the quickest and most-effective solution is painting this surface to get a new and fresh-looking appearance. This is where primer comes into play and will serve as a good base color to cover over darker colors that you want to cover up.
With that being said, applying primer and paint is a straightforward process that can be accomplished with the right steps. It all starts with cleaning all these surfaces you can reach with soap and water. After everything is clean, you’ll want to sand the surface to take off any shine using fine-frit sandpaper. This allows a primer to stick onto the surface rather than risking a mirror-smooth surface that could chip or crack if it’s hit by something by accident.
When the sanding is done, you’ll need to apply a layer of primer using a paint sprayer or roller brush. Depending on your primer and the surface you’re painting, you’ll need to consult the paint store on which brand is best. You’ll get better results for smoothness when you use a paint sprayer or a fine foam roller. Either way, be sure to mask off everything around your countertop to reduce getting paint on anything you don’t want to be painted.
Be sure this first layer is spread evenly and leave it to dry for the recommended period it needs before applying the first coat of paint. After the primer has dried you can now start painting with oil-based paint, chalk paint, acrylic paint, or epoxy paint- depending on your budget and preference for paints. Two finely applied coats will be necessary to get the best results, but if you need an extra layer for smoothness- then don’t hesitate to add one more.
Using a brush or roller to apply primer and paint evenly
Every artist has their favorite painting method, except when it comes to seamless finishes. If you’re applying primer and paint to your bathroom countertops, you want to avoid using a standard paintbrush at all costs. You should use a fine foam roller or a spray gun that is spraying out thinned paint. The only exception is epoxy paint which tends to best be applied using a foam roller and gives a nice glossy look when it cures.
You should also know that using a brush to apply the primer and paint, you’ll want to use smooth and light strokes to maintain even thickness. Softer and finer brushes work better with sable hair to reduce seeing any brush strokes likewise. Using these techniques helps to avoid lumps or bumps on the surface being painted. A roller is nice since you can alternate directions to get a smoothly painted surface with very little sign it was applied with a roller.
Using the a roller for the surface and a brush for the edges is also a popular approach.
Whatever technique you choose to go with, don’t over-paint any particular area more than you need. Get a nice even color (primer or paint) and then let it dry. This will give you the smoothest and best surface that doesn’t appear to be painted.
Allowing The Countertop To Dry Completely
Here is a tip that you need to know is more important than anything else. After the painting process is finished, allow the countertop to dry completely. This will usually take several days before you can use your countertop again. This is where that famous saying ‘Like watching paint dry’, so during this time, make sure to keep your bathroom closed off as much as possible. That doesn’t mean that there can’t be minimal airflow with a small fan and a slightly open window.
When you do this, you’ll give your paint a good chance of drying, so that it lasts longer and looks better in the long run. Be patient and wait until you add another layer since oil paint takes just as long as epoxy paint takes to fully cure. You’ll be thankful at the time given when the paint is completely cured, so give enough time in between coats as much as you can afford.
Sealing With Polyurethane
Let’s talk about sealers at this point. Sealing any newly-painted bathroom countertop is one of the last steps in ensuring it looks fantastic for years to come. Polyurethane serves as a protective coating and prevents the possibility of dirt, oil, and water from degrading your paint job. Before performing this step, you will also need to make sure that you’ve sanded the painted surface lightly to create a smoother finish.
Remove any dust or debris that may have stuck during the painting process with 600-700 grit sandpaper. This will help polyurethane sealers to adhere to the paint and remove any brush strokes or wonky spots you don’t like. Use a sprayer to apply the sealer or opt to use a foam roller if you don’t have a paint sprayer. You could use a fine bristle paint brush if you are very careful and apply a second coat after the sealer is totally dry.
Protecting and sealing the countertop against water damage
Painting your bathroom countertop is indeed a cost-effective way to rejuvenate tired-looking countertops. Keeping these countertops looking good is a matter of how well-sealed and protected it’s been protected against water damage is another important step in the DIY process. To ensure that all your hard work lasts longer, it’s important to complete all of the necessary preparation steps before painting.
If you’ve completed all of the sanding and priming correctly there should be no further issues that can occur. Just as a tip, you should always use two coats of paint to ensure the best coverage before applying a protective sealer. This will go a long way if you ever need to retouch a spot that gets scratched or damaged accidentally. Epoxy paint is pretty tough for scratches, but the second-best option is using oil paint.
Simply adding the sealer will protect the painted surfaces from water and moisture damage over the next years to come.
Maintaining Your Newly Painted Countertops
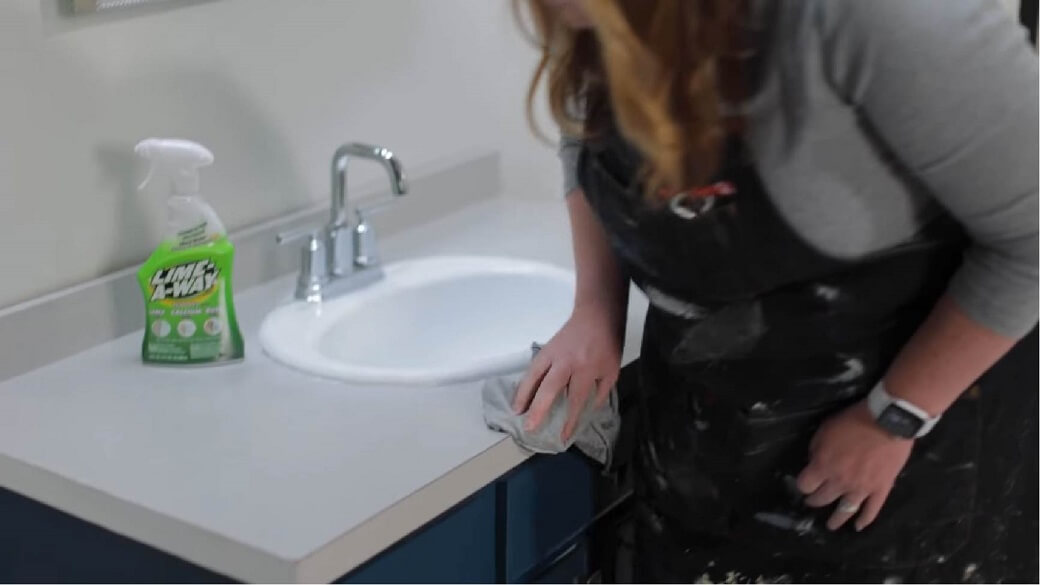
While painting bathroom countertops is a great way to renew your bathroom without the hassle or cost of replacing them, there is one last piece of advice. You‘ll want to maintain the finish so it appears as fresh as the day it was completed. To keep your new countertops looking great, it’s important to wipe them down daily with a non-abrasive cloth and mild soap. Another option is to use cleaning wipes that don’t contain alcohol or oil such as baby wipes.
Avoid using harsh cleaning agents that can strip away or damage the polyurethane finish. If this finish does start to look scratchy or not as shiny as it did before, it will be time to add a new layer of sealer to bring back that factory shine.
Tips on how to clean and prevent staining of painted countertops
As mentioned before, using household cleaners will eventually attack and damage the sealer that’s applied to a countertop. You can prevent this by using cleaners that are non-abrasive and all-natural. There are plenty of disposable baby wipes and chemical-free bathroom wipes that are great for daily cleanup. These will prevent micro scratches that are caused by cleaning sponges and allow you to have a consistent shine for a while.
You can further opt to use a spray wax that is buffed onto the sealed countertop for a constant glow. If the surface is ever stained with hair color, or perfume, or becomes discolored by something sitting on the counter, this will need to be cleaned off and sanded to remove the stain. At worst, you may need to strip the surface layers with fine sandpaper and add a newly painted layer of paint and then the sealer to refresh the surface once again.
Resealing will also help maintain that newly painted look for longer and may only need touchups every 6-8 months on average.


No comment